Scrolling backgrounds are fantastic for giving the illusion of movement and in the last post we looked at a simple scrolling background. In reality, you find that objects closer to you move more quickly than those that are far away. We can simulate this in PICO-8 by layering the backgrounds and letting them move at different speeds.
To start with, make sure you understand how to make a background scroll. If you haven’t looked at the earlier tutorial, you should as this tutorial builds on those ideas.
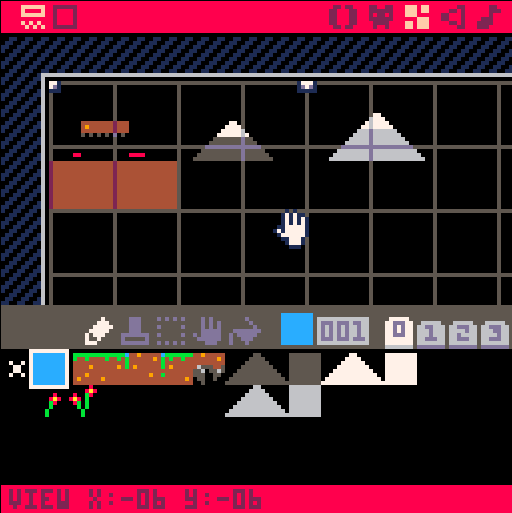
The first step is to create the backgrounds we need. I will be using three layers, so I need three backgrounds. As they will be overlapping I leave the background colour black (transparent). These backgrounds are drawn in the map editor and do not need to be 128 pixels wide or drawn in a line, but it is important you know the top left position of each one and the width and height (in cells). The diagram below shows the zoomed out map editor with my three backgrounds – the brown tiles, the dark grey mountain and the light grey mountain. I have spaced these out evenly as space is not an issue, but there is no need to do this.
To start with we declare three x values for the three layers: front_x, hill_x and mnt_x and set them all to 0. We also set speeds for each of these layers. Remember, the closer something is the faster it moves, so we can use speeds of 1, 0.5 and 0.25 but feel free to change these and see how it changes your view of distance.
function _init()
 front_x=0
 hill_x=0
 mnt_x=0
 front_spd=1
 hill_spd=0.5
 mnt_spd=0.25
end
Next we need to update the positions of the three layers. For each layer we adjust the x position by the speed value and reset the position once it has gone off screen. We use _update60() to allow for the non integer speeds we have set (PICO-8 can judder if the usual update function is used for movement.)
function _update60()
  front_x-=front_spd
  if front_x<-127 then front_x=0 end
  hill_x-=hill_spd
  if hill_x<-127 then hill_x=0 end
  mnt_x-=mnt_spd
  if mnt_x<-127 then mnt_x=0 end
end
Finally, the _draw() function will draw each layer as well as a blue background (cls(12)). The most important thing here is the order of drawing: start with the layer that is furthest away and draw each one in turn. As before, each map section is drawn twice to allow for seamless scrolling.
function _draw()
  cls(12)
  circfill(30,30,15,10)
  map(32,0,mnt_x,0,16,16)
  map(32,0,128+mnt_x,0,16,16)
  map(16,0,hill_x,0,16,16)
  map(16,0,128+hill_x,0,16,16)
  map(0,0,front_x,0,16,16)
  map(0,0,128+front_x,0,16,16)
end
The end result is a surprisingly effective scrolling background.
It is possible to use a table for the different layers and to wrap the update and draw code into two different functions that will loop through each layer in turn. The general principle remains the same, however.
Happy programming!

